|
|
|
German Notes
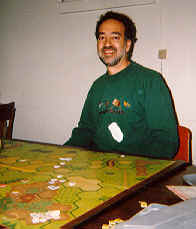
By Joe, a Seattle Puget Sound player. 10/98.
Joe, the fiesty Italian that beat the Russians.I see that the Russian has almost as many squads as I do. If I am to attack, I need infantry. I decide to buy 2 rifle companies and up sniper.
My general strategy was to have a major attack through storage tank area and isolate Russian from east board edge. With isolation, he would not be able to reinforce into the factory complex, and I will have a better time of taking factories in scenario 2. This force would also be used to maintain my minimum 10 cliff hex ownership needed to win the game.
I hoped to have enough forces to swing into the factory hexes from the east, once I broke up his defenses north of the storage tanks. I also kept large forces just south of factories to soak up his forces so they couldn't redeploy
and stop my isolation movement, and this force could also prevent his attack of cutting my forces off from west board edge.
My initial bombardment couldn't have been much better. It shattered his defenses north of storage tanks and my assault moved rapidly. Successful use of OBA smoke also aided in my northward assault.
Russian didn't have many forces to stop my northward movement, but still my movement through housing complex took five turns to the line Z11-CC10-GG8. If it wasn't for a colossal blunder on my part, I would have had Russian isolated by turn 5, by obtaining cliff hexes to east of Bldg GG8. I assumed all of RB rules were in effect, and shoreline are strategic hexes in RB. Shoreline hexes are not strategic in DTW, the cliff hexes are. The blunder was offset by fate, when the Russian didn't end the scenario at end of his turn 5, and I was able to isolate him on turn 6 by capturing the cliffs. Fate was on my side again and I got a turn 7 to fully exploit my capture of the whole housing district and give myself a lot of flexibility to attack the factories from east/west/south on scenario 2.
The Germans were very successful with bombardment, OBA, getting 7 turns. The only change I would have made in my setup was to buy Stukas, instead of increasing my sniper.
Russian Notes
By Robert, this site's owner
[Introduction] [Organized Retreat]Introduction
The Russians face a huge challenge in this scenario. While having a lot of infantry, they have to protect a perimeter that runs the complete length and width of the board. And that is the key of the game. First, you need infantry and more infantry. I buy as many as I can. That is, one company in reserve, one assault platoon (for the FT and DCs), a sniper and four fortification points.The grand strategy was none too clever. Since the Germans could come in from any side and set up second, they can pick the weakest sector(s). Therefore, I set up a general defense along the perimeter with the significant number centrally located. These were the reserves. After the German committed their troops, I would rush everything over there.
The details of the plan were threefold. I assumed he had three attack options. The extreme German left, near G7 area, the center, X32 or the Housing district on the German right (along the river). First, I fortified three buildings on the front. This was never intended to stop him but merely slow the advance. In one case three fortified locations provided mutual fire support and the back most location had a tunnel to the center of the Factory xxx which had "the good leader," FTs and engineers. In both instances the infantry would do fighting withdraw. Second, The next row of factories had my main line, including three HIP HMGs and HIP tanks. Third, the reserve units would surge to the front. Also the reserve units were placed in harms way, intentionally so, to activate them.
In theory, my plan worked. I was able to fall back, to always maintain a solid front and to react as needed. In practice, it did not matter. The Germans launched a classic point attack, actually two such attacks, and always had a localized 3:1 advantage. In fact, they so overwhelmed the defenders that it in spite of the +3 stone locations, DFF, and concealment, the Russians were losing 2:1 in squads during the entire attack. Unless they were able to ever reduce that ratio, the Russians would never win.
The second attack came through the Housing District along the picturesque coastline. This is the key of the game, one I think is a game breaker. The district, a 35 hex-long series of stone buildings. Each dormitory is one hex wide and up to five hexes long are arranged in matrix city blocks. The area is simply undefendable. While alluring at first, the relatively open terrain and series of positions to fall back upon, is tempting. In practice, it becomes a death trap for the defenders. Each building may be isolated and surrounded. It is not a matter of attack strength, but rather the numbers of attackers. Half squads are just as effective for blocking rout as any other unit. With the Germans having the advantage in the number of units, an organized attacker would have little problem cleaning up the district. Again, in practice, the Germans did have little problem doing so.
Admittedly, I underestimated the value of the district. While I knew the Germans would capture it, making the factory locations isolated, I misread the PL rules. Unlike KGP, *no* units may enter an isolated DTW location. Hence, with that cut off, the factory defenders. That makes the link to the river even more important and hence makes the likelihood of a German attack through it much greater. The Russian forces needed to properly defend the area would be prohibitive. The units used there would make other sectors so weak, the Germans would end up attacking there instead. It was a hard decision to make, but the Housing District can not be well defended. In my case, I put two ATs and two AFVs in the area along with 10 squads. Only the AFVs never made it out alive. As predicted, the Germans cut off the escape rout along the main street with effective fire (HMG, MMG, 8-1) leader on the 1st floor. What units the bombard spared, were quickly overrun by impressive coordination of light AFVs and an infantry screen. To my credit, I did kill five vehicles before he adequately covered himself.
Organized Retreat
In some ways the game is fairly boring for the Russians. The Germans have the burden of attack and as such they get to decide on the approach, they have the moving units, get plenty of attacks and have cooler toys. For the most part the Russians set back and take it. My point is not going anywhere, by the way. I am just stating how it is.But an organized retreat is difficult to do and in this, many players get wiped out to the man but not doing it right. For instance, there is no reason a Russian unit need actually be eliminated in combat. It general, it is very difficult to do kill anything. I have seen a FT, DC and two 12 FP attacks only reduce and ELR two squads. While it took a sizable portion of the attackers front line units, I still had two half squads to show for it. The Germans would have to repeat that same attack next phase.
On the other hand, causing a failure to rout not only completely eliminates the unit, but often took nothing more than a single breaking. No side can tolerate equating a broken unit with an eliminated one. That is the trick. Therefore, the Russians must conduct an organized retreat. In that, at all times, the front line has to be more or less continuous and without being flanked. It is very important not to let any units through the line or get around behind you. Easier said than done? Not at all but it takes foresight to know when to drop back. If you think the time is right to drop back, for instance, it is already too late. If you think it is too early to do so, it probably is not. Even experienced players are often surprised how quickly a line can disintegrate.
Maintain a continuous front. That is, do not allow large holes for the attacker to pour through. Always present as many units on the front as possible and with supporting pairs. First, it dilutes the attackers effectiveness in that he has to spread his FP over multiple targets. Second it allows greater return fire. In DTW, this is of questionable effectiveness during a given fire phase. However, it does restrict his movement because for First Fire. That is the key. Everything that slows him down is good. In all cases resist the temptation of putting a single unit on the front with the naÔve idea of "slowing him down." This is the biggest mistake in any wargame. The unit will be lost and the attacker will be no worst for the effort. This will start a slippery slope toward defeat. You will be weaker, so your losses will be accelerated, which makes you even weaker, etc.
The Russians should be able to set up good rallying points in the factories. The interior walls provide enough cover that broken units can rout back, rally out of gunshot range and then back into battle. Since the lines are ever shorting, they need only advance a few hexes, often being concealed and using assault movement. When the pressure gets to much of a if a leader breaks, reset your rallying points.
In this manner, an organized retreat should slow the attacking Huns to less than a factory row per date. But how much you can retreat is another topic…
(More to come)
Other's Notes
By our Friends in the Midwest.The Russian player you need to think differently that the Germans. The Germans will concentrate their force and have local firepower superiority. In addition, German MG crews with 9-2 leaders can be killer. The Russian can not stand toe-to-toe with the Germans.
Some suggestions I would have are:
1) Burn - Kindle building that it looks like you are going to lose. This has two effects. One is that reduces the terrain to ground level and secondly the blazes and subsequent spreads will "channel" the German attack. I have seen games with there are over 30 blazes on the board and the all started from one kindle two CGS earlier.
2) Pick your Defense - You can not defend everything. When you defend, defend in depth so you front line squad have a rout path (if you start losing guy because of failure to rout you do not have a solid defense).
3) Set up traps - One of my favor things to do. Here are some examples. a) Set DC in a hex the German is likely to enter (very painful if you catch a stack!) b) HIP 6-2-8 in building with a minefield. If you look at the setup and possible attack paths find a locations that he is likely advance into. With a little luck he will break entering the building and you will ambush him. I have killed three squads with this one. In addition, if you there is a sewer location in the hex your 6-2-8 has an escape path. c) HIP a unit on a rooftop stair way hex. Pick a hex that has a good LOS to you position. This will likely bring a good leader and MG Crew. Most people don't think to search the roof.
4) Use a Reverse slope defense - Make the German come to you. Keep a Concealed unit near the front like. If you can get some CC with the -1 stealthy and -2 concealed and HtoH CC number you can really make the German pay.
5) Counter Attack - This one is tough, but don't like the German's pick all the points of attack. I like setting up a number of units HIP in a area near the front line. If the German does not attack there, around turn 3 I start moving against that flank. If he does attack there then you have a "big surprise" for him. I won a DTW CG II game with this one when I cut the German line to the river. My opponent was very surprised to find 6 squad rushing has weakest point in the line.
6) T34 - There are the best tank in the CG. German Guns/Armor can't touch the frontal armor. Just don't like the German Infantry overrun them. Support them at all costs.
Kurt Martin's Notes
-You'll have to find ways to make the German pay for his advance. Unlike RB, the weight of purchasing doesn't lie with you, since there's more motion and mobility in the battle. With that in mind, you have to look to exactly deny him the victory conditions and be in the right place at the right time. You can't stop the Germans at every point - just a few key ones, if that, unlike RB, where you can choose to bleed them anywhere. Some keys from the playtest:
A few key mines
A few key HIP units
More armor than usual
Not many fortified locations
Less effort to stop attacks and more to channel them
More running away